RunwayML Lip Sync Guide: A Step-by-Step Tutorial
Welcome to the complete guide for RunwayML Lip Sync. In this article, I’ll walk you through how to create AI-generated lip-sync videos using RunwayML. If you’re using a still image or a video, Runway’s tools can bring your content to life by syncing it with audio.
Follow along as I show you each step in the process, from uploading media to adding effects and generating your final video.
How to use RunwayML Lip Sync?
Step 1. Uploading Media to RunwayML
First, log into your RunwayML account. Once you’re signed in, head over to the Generative Audio Tool.
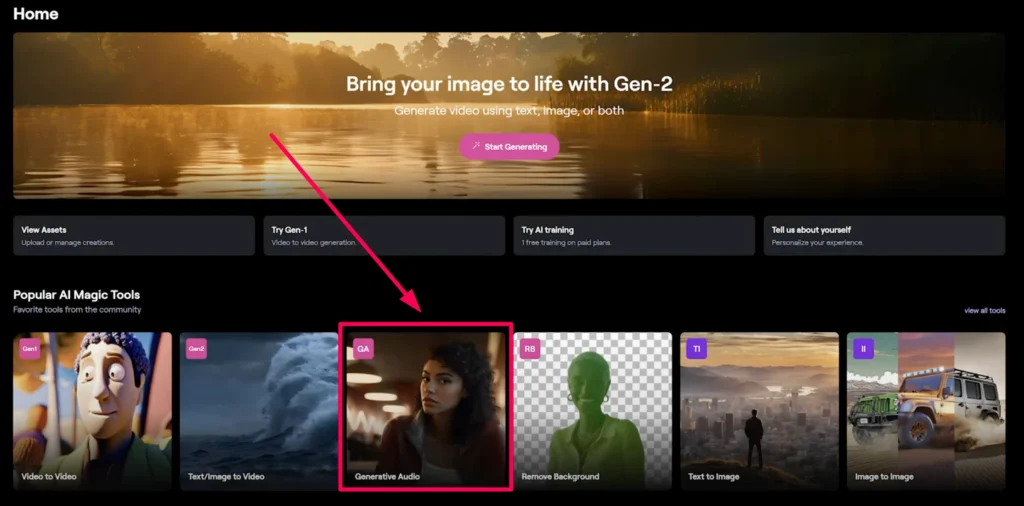
Here’s where you’ll upload your media file—either a photo or a video—or, if you’re just testing things out, you can use one of the demo images provided.

Supported Media Formats:
- Audio file types: MP3 or WAV
- Maximum audio length: 60 seconds
- Image/Video requirements: Your media should be human or human-adjacent, meaning it should have normal human facial features.
If you’re working with a video and your audio file exceeds the video’s duration, don’t worry.
RunwayML has a feature that will boomerang the video, playing it forwards and then backwards to match the length of the audio.

Tip: This boomerang feature is incredibly helpful if you’re using Runway’s Gen 2 tool, which we’ll cover in a moment.
Now that we’ve got our media uploaded, let’s jump into the next step: generating images with text prompts.
Step 2: Generating a Character Using Text-to-Image Tool
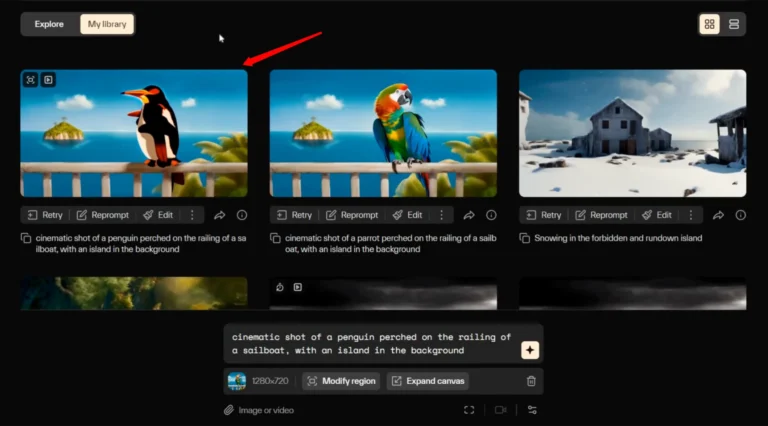
Go to the Text-to-Image Tool in RunwayML. Here’s where you can type a text prompt to generate your desired image.
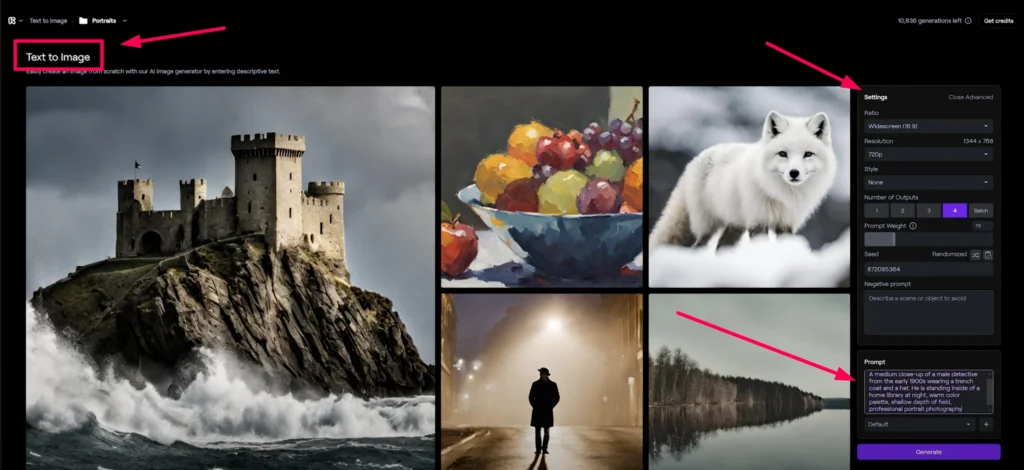
Here’s the prompt I used:
“A medium close-up of a male detective from the early 1900s wearing a trench coat and a hat. He is standing inside a home library at night, warm color palette, shallow depth of field, professional portrait photography.”
I also added a negative prompt to make sure the generated image doesn’t have any unwanted features:
“Ugly, bad, deformed, improper anatomy.”
Step 3: Upscaling the Image
Once you’ve generated your character, it’s time to upscale the image to add more detail.
RunwayML allows you to quickly upscale your image using the Magnific tool, which sharpens the picture and brings out fine details.
After this, we’re ready to move on to generating video with Gen 2.
Step 4: Creating Motion with Camera Movements
If your audio file is relatively short—say around four seconds—you can use Runway’s camera movement feature to give your video more dynamic motion.
For Short Audio Clips (Less than 4 Seconds)
For shorter audio clips, you can enhance the video by adding subtle camera movements. This helps bring more life to your character. In this example, I’ll add some upward motion to the face and hat of my character, simulating a slight head movement.
For Longer Audio Clips (More than 4 Seconds)
When working with longer clips, the focus shifts from camera movement to more detailed facial movements. In this case, I’ll use motion brush to add head movements that sync with the audio. I’ll also include a simple prompt:
“The man is talking.”
The result?
A 4-second clip of my character lip-syncing, and when it reaches the end, the video automatically plays backward to sync perfectly with the audio.
Step 5: Adding Audio to Your Character
Now that our video clip is ready, it’s time to bring in the audio. Go back to the Generative Audio Tool and upload the video you just created.
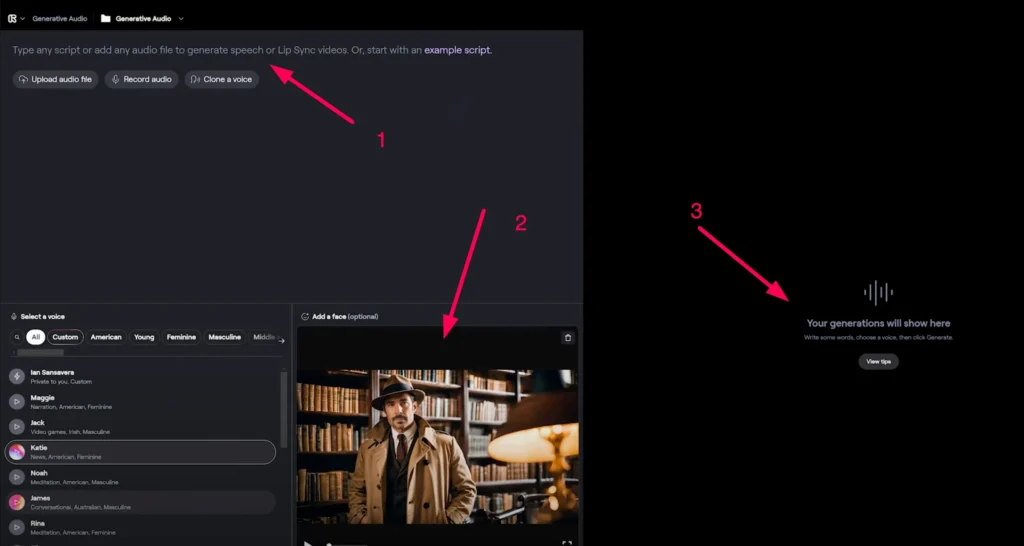
Next, either record some audio or use an audio file that you’ve prepared.
For this tutorial, I’m going to quickly record a script that fits the detective theme.
Here’s what I used:
“Ladies and gentlemen, gather around. The tale I’m about to unfold is as twisted as the alleys of this godforsaken city. In my life of work, the night is neither friend nor foe—it’s a canvas painted with the sins of men. A stage where shadows play the lead role. And truth… truth is a fleeing mistress, always just out of reach.”
Feel free to use your own voice, a voice generator, or even a text-to-speech tool. For this example, I used 11Labs to give my detective a gravelly, noir-inspired voice.
Finalizing and Generating the Lip Sync Video
Once the audio is recorded and uploaded, click the Generate button in RunwayML. You can now sit back.
Runway will sync the audio to your character’s lip movements automatically.
Optional Enhancements
- Color Correction: Adjust the color tones of your video for a more polished look.
- Handheld Camera Motion: Add some subtle camera shake to mimic the natural movement of handheld footage.
And just like that, you’ve created a fully AI-generated lip-sync video.
Conclusion
This new lip-sync feature in RunwayML is a fantastic addition to the platform’s toolkit. If you’re a content creator looking to enhance your videos or simply experimenting with AI-generated media.
If you found this guide helpful, drop a comment below to let me know how you plan on using RunwayML’s lip sync feature.
